Physical Address
Mumbai, India 400001
Physical Address
Mumbai, India 400001

USB technology has revolutionized the way we transfer and store data. Over the years, different versions of USB technology have emerged, offering various speeds and capabilities. USB 3.0 is one of the fastest and most widely used standards for data transfer, but many computers and devices still use USB 2.0 ports. If you’ve found yourself wondering how to do data transfer with USB 3.0 flash drive on USB 2.0 port, you’re in the right place. This article will explain the compatibility between these two USB versions and guide you through the process of successfully transferring data between them.
Before diving into how to do data transfer with USB 3.0 flash drive on USB 2.0 port, it’s important to understand the differences between these two USB standards.
Released in April 2000, USB 2.0 is an older standard that many devices still use today. It offers data transfer speeds of up to 480 Mbps (megabits per second), which was quite fast for its time. USB 2.0 ports are recognizable by their black color on the inside of the port.
USB 3.0 was introduced in November 2008 and marked a significant improvement over USB 2.0. It offers transfer speeds of up to 5 Gbps (gigabits per second), making it over 10 times faster than USB 2.0. USB 3.0 ports are often identified by their blue color inside the port.
One of the most common questions people have is whether USB 3.0 devices are compatible with USB 2.0 ports. The good news is that USB 3.0 is backward compatible with USB 2.0. This means that you can use a USB 3.0 flash drive in a USB 2.0 port, but there’s a catch—the transfer speed will be limited to the maximum speed of the USB 2.0 port, which is 480 Mbps.
Now that you know the key differences between USB 2.0 and 3.0, let’s move on to the practical steps of how to do data transfer with USB 3.0 flash drive on USB 2.0 port.
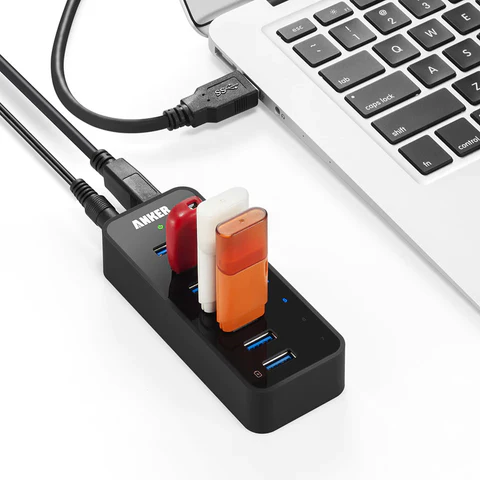
The first step in how to do data transfer with USB 3.0 flash drive on USB 2.0 port is as simple as inserting the flash drive. While USB 3.0 flash drives are designed for USB 3.0 ports, they fit perfectly into USB 2.0 ports because of the standardized design of the USB connector.
When using a USB 3.0 flash drive in a USB 2.0 port, you will notice that the data transfer speed is slower. As mentioned earlier, USB 2.0 caps at 480 Mbps, while USB 3.0 can handle up to 5 Gbps. However, even at reduced speeds, you can still transfer large files or back up data.
For instance, transferring large media files, such as movies or high-resolution images, will take longer when using a USB 3.0 flash drive in a USB 2.0 port compared to using a USB 3.0 port.
Once your USB 3.0 flash drive is securely connected to the USB 2.0 port, follow these steps to transfer your data:
Once the data transfer is complete, it’s essential to safely eject the flash drive to avoid data corruption. To do this:
By following these steps, you’ve successfully completed how to do data transfer with USB 3.0 flash drive on USB 2.0 port.
While using a USB 3.0 flash drive on a USB 2.0 port limits the transfer speed, there are ways to optimize the transfer process and improve overall efficiency.
If you have a large number of files to transfer, consider breaking them down into smaller batches. Transferring files in smaller chunks can reduce the chance of errors or slowdowns that may occur with large data transfers. This will help smooth the process of how to do data transfer with USB 3.0 flash drive on USB 2.0 port.
Running multiple applications while transferring data can slow down the process. For optimal performance, close any programs or applications that you don’t need during the transfer process.
To speed up file transfers, you can compress large files before transferring them to the USB 3.0 flash drive. Compression tools like WinRAR or 7-Zip can reduce the file size, making the transfer faster and more efficient.
If you frequently perform data transfers and need faster speeds, consider upgrading to a computer with USB 3.0 ports or using a USB 3.0 expansion card. This will allow you to take full advantage of your USB 3.0 flash drive’s speed capabilities.
Despite the speed limitations, using a USB 3.0 flash drive with a USB 2.0 port has several advantages:
Knowing how to do data transfer with USB 3.0 flash drive on USB 2.0 port is a valuable skill, especially for those using older hardware but who want to benefit from modern USB storage devices. While the data transfer speed will be limited to that of the USB 2.0 port, the process is straightforward and highly compatible.
By following the steps outlined in this guide, you can easily transfer data between your USB 3.0 flash drive and USB 2.0 port. Keep in mind the tips for optimizing your transfer process, such as closing unnecessary applications and compressing files. Although it may take a little longer, using a USB 3.0 flash drive on a USB 2.0 port is a great way to maximize the usefulness of your hardware until you’re ready to upgrade to faster ports.
So, now that you know how to do data transfer with USB 3.0 flash drive on USB 2.0 port, you can confidently transfer your data with ease!